Archives for May 2011

RSS to Email


I used to manually create email newsletters for a number of email lists I maintained.

Each one would take me a good 30 to 60 minutes to pull together, and they were literally compilations of recent blog posts with an excerpt and link for each one.

RSS to Email

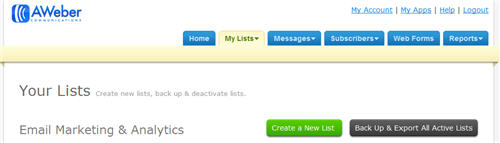
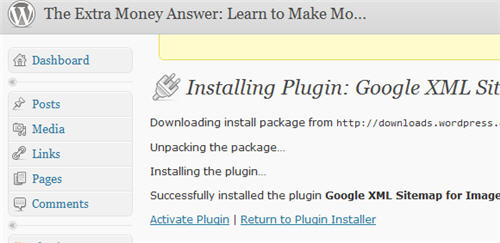
Then I came across the Blog Broadcast RSS to Email tool in AWeber.

RSS stands for Really Simple Syndication, but you don't really have to know that. Just think of it as a way to syndicate the content from your blog.

The AWeber Blog Broadcast RSS to Email tool allows visitors to sign up for a traditional email newsletter on a blog or other website that uses RSS.

The Blog Broadcast tool will take the content that is published through your blog and automatically create an email newsletter sent to subscribers.

So basically, you just have to set it up, which is easy, and then it publishes your newsletters on autopilot.

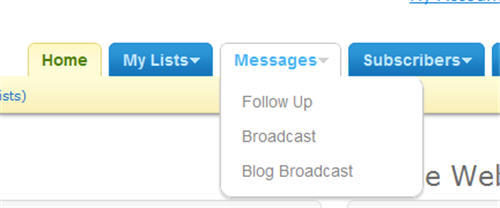
After logging in to AWeber, go to “Messages” and then “Blog Broadcast”.

blog broadcast

There, you'll click on “Create a New Blog Broadcast”.

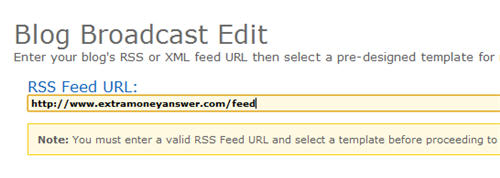
Next up, you will enter your RSS Feed URL.

Your blog should have a text link that says RSS or feed, and the RSS Feed URL will be in a format like this: http://www.extramoneyanswer.com/feed

RSS feed url

The following field is the subject that will be in each of your email newsletters.

You can either enter some static text that will always appear as the subject each time, or there are some variables you can use.

I like the following to automatically make the title of the blog post as the subject: {!rss_itemblock}{!rss_item_title}{!rss_itemblockend}

RSS email subject

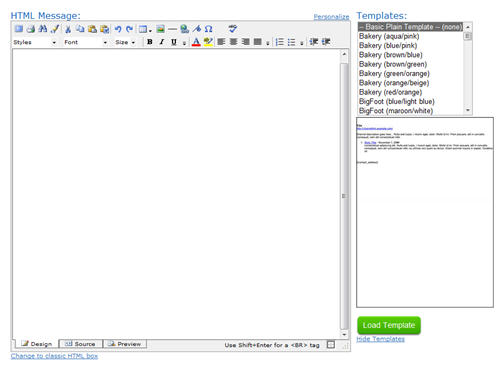
AWeber provides a number of templates to present the newsletter in a nicely formatted way. But just stick with the “Basic Plain Template” to get stated, and you can pretty it up with a more advanced template later if you wish.

Click the green “Load Template” button to insert the “Basic Plain Template” as the HTML Message and the Plain Text Message.

Basic plain template

After loading the template, there are a handful of settings to choose… the time and frequency the emails should be sent, whether you want to track clicks on links, the option to share via Facebook and Twitter, as well as getting statistics via email for each newsletter sent out.

Here is what I like to go with on this blog:

RSS to email settings

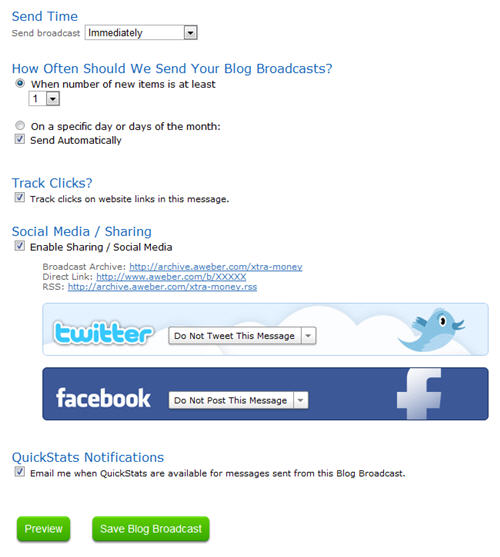
After you've gotten this all sorted out, click the green “Save Blog Broadcast” button.

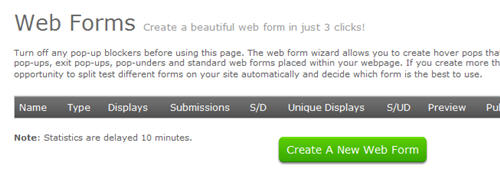
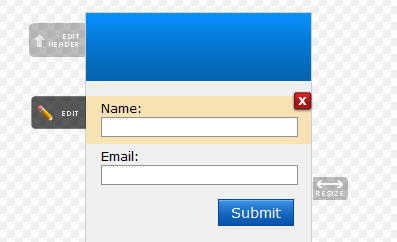
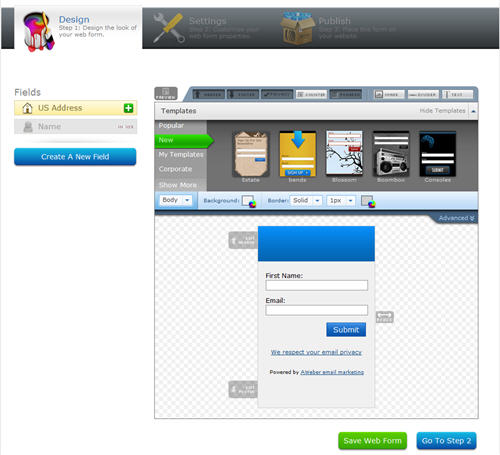
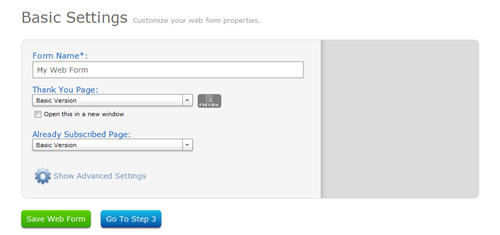
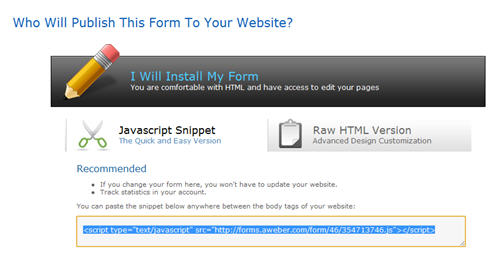
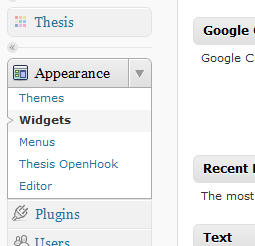
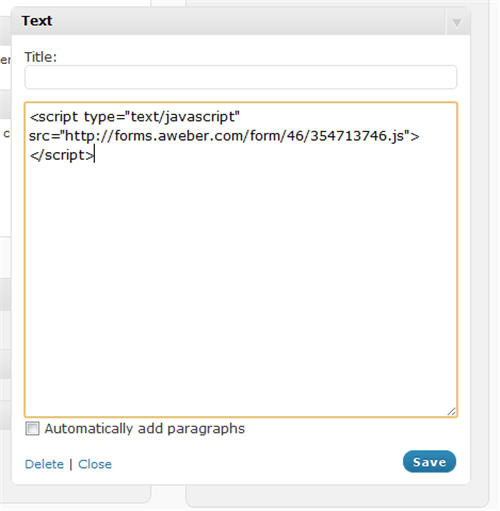
Now your newsletter is set up, but you still have to add a Web Form to your site to enable people to submit their email address to subscribe to your RSS to email newsletter.

Add an Email Form to Your Site


You've created the email list in AWeber, and now you need to give people a way to subscribe to your list.

Subscribe to an email newsletter

Your first step will be to click on the “Web Forms” tab.

This will enable you to start up the web form wizard and create hover pops that are immune to pop-up blockers, traditional pop-ups, exit pop-ups, pop-unders and standard web forms placed within your site.

Web forms tab

Even though you have all of those options, and pop-ups can be very effective, I would suggest going with a standard web form to get started.

The standard web form to collect email addresses will have a spot on your site, so people can easily subscribe to your email list.

Click “Create a New Web Form” to get started.

Create a new web form

AWeber provides a big variety of templates for the email subscription form, so check through what they've got there to see if there is something that really works well with your site design.

Personally, I like to stick with their basic look, but I do edit the form. By default, it just says “Name”, so you'll have some people who enter their first name, while others enter their full name.

Scroll over the name area and then click “Edit”.

Edit the web form

Then change the text from “Name” to “First Name” and click “Save”.

The reason for this, in addition to avoiding any confusion, is so you can personalize emails in the future and it will look truly personal.

When you address somebody by both their first and last name, it's a tip off that you're not really being personal.

After you've made that edit and settled on a template you like, click “Go to Step 2”.

Email form template

On the next page, you can configure the Basic Settings. The “Form Name” is the only area you really need to change for now. Enter something that will be memorable to you in the future, assuming you'll test multiple types of forms to collect subscribers.

Then click “Save Web Form” followed by “Go to Step 3”.

Email form basic settings

You will now be asked the question, “Who Will Publish This Form To Your Website?”

As far as I am concerned, there is only one option – do it yourself.

Get out of your comfort zone and empower yourself here. You're going to have to get the hang of pasting code to your site, so now is a great time to start.

So scroll over “I Will Install My Form” and you will see one line of Javascript code.

You could also click a tab to get the raw HTML code, but stick with Javascript, because after it is installed, if you decided to change the template in AWeber, the changes will instantly kick in on your blog.

So copy that code and then go into your WordPress admin area.

Who will publish this form to your website?

When you're in WordPress, click on “Appearance” and then “Widgets” from your left-side menu.

WordPress widgets

Drag a “Text” widget over to your “Sidebar” area on the right side and it will pop open.

Past your AWeber Javascript code there and click “Save”.

Text widget in WordPress

Now, when you look at your blog, you should see an email subscription form in the sidebar.

Create an Email List


The first thing to do in AWeber to get started is to create an email list.

Woman creates an email list

I typically create one list per affiliate site, but you can create multiple lists for your site if you have a need.

After logging in to AWeber, click the “My Lists” tab and then the “Create a New List” button.

Create a new list

Then you'll enter in some basic information (list name, list description, “from” name for your emails, and the “from” email address).

Your contact snail mail address, which is a requirement, will be pre-populated, as you provided this when you created your account.

There is also an option to receive an email every time a new subscriber is added to your list. I did that once and it got pretty annoying, so I'd suggest not using that feature.

Email list basic information

Click “Save Settings” after you've entered your information.

Next up, you personalize your email list by entering your company information (company name, company url, email signature, company logo), as well as linking up the list to Facebook and Twitter, and adding some “Global Text Snippets” that will appear in the footer of each of your emails.

I'd suggest focusing on the company branding section to start, and you can go back to add in the Facebook and Twitter parts, as well as the “Global Text Snippets” later on.

Email list personalization

The other features are dynamic, but it's most important to get things in place now and start building your list.

Click “Save Settings” after you've entered your information.

The final thing to do is to personalize your confirmed opt-in message, which is an email your future subscribers will receive when they submit their email to join your list.

There are a handful of areas that can be personalized, and I encourage you to take advantage of all of them.

Your email confirmation message

I would suggest using the first name option in both the subject and the start of the email text, adding a short message in the body of the email to explain what will be in your emails, and then edit the signature to provide your contact information.

Your subscribers are valuable, so make yourself available from the start of the relationship.

There are a couple more items on this page before you're finished: Require Opt-in on Forms and Success Page.

Email success page

Skip on by the part about requiring opt-in – you want that and there is nothing you have to change.

As far as the success page, that's where people will be sent after they confirm their email subscription. You can make a custom page in WordPress to welcome them and post that URL here.

Click “Save Settings” and now you've got a new email list to start building.

New email list created

Now you can move on to RSS to email, email newsletters, and an email follow-up series.

Using Email to Drive Traffic to Your Site


Email marketing is an important part of your strategy to drive traffic back to your own site.

Email marketingAfter all, that whole “if you build it, they will come” thing doesn't apply to websites.

In addition to creating content for your site, you then have to keep in touch with people who have agreed to receive updates from you via email.

I use AWeber as my email service provider for a number of reasons, including their high deliverability rate (zero tolerance for spammers), autoresponder followups, email form and newsletter templates, and their blog posts to email feature.

I will show you how I use AWeber to do the following:

These practices combine to reach people interested in the topic of my sites and continually come back to see my new content.

WordPress Plugins


WordPress is configured now, so there is one more step to have your site all ready to go, and that's to add some plugins to your WordPress site.

WordPress plugins are applications that enhance the capabilities of a WordPress blog.

For example, the Facebook “Like” button at the top blog posts on this site is a plugin.

social-sharing-plugins

The same goes for the Tweet and Google+ button, and a number of other tools I use behind the scenes to make WordPress work the way I want it to work.

Here are the plugins that I am using on this WordPress blog:

  • Akismet – fights comment spam
  • Disqus Comment System – replaces the basic WordPress comments
  • Facebook, Twitter & Google+ Social Widgets – enabling social sharing
  • Pretty Link Pro – create redirects of long links with your own domain
  • WordPress SEO – an all-in-one SEO solution

But how do you add plugins to your WordPress blog?

On the navigation bar on the left side when you are logged into WordPress, click “Plugins”. This will take you to a page that displays your current plugins, as well as enabling you to add new plugins.

Assuming you want some or all of the plugins I've mentioned, click “Add New.”

Add new plugins

This will bring up a search box. Akismet should be pre-installed for you, so try searching for Google XML Sitemaps.

Install WordPress plugin

Then click “Install Now” for the plugin you wish to install. You'll be prompted with a question on whether you are sure you want to install the plugin. Just click “OK”.

This will download the file to your WordPress blog, and you then just have to click “Activate Plugin”.

Activate WordPress plugin

That's it – you've got that plugin installed. Just follow that process for each new plugin you want.

Some will have extra steps to configure the plugins to best suit you, so be sure to read any additional instructions that come with your plugins.

There are many thousands of other WordPress plugins, so if there is some feature you wish you had on your blog that's not there, try searching on Google for words that describe that functionality and the word plugin.